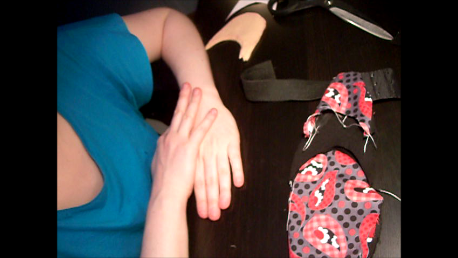
woensdag 14 mei 2014

New sewing techniques: Sewing the round bits prototype 48

48a

This picture shows how little cuts were made and fold over to then sew them with a sewing machine.
Elements of experience:

Positive expected: easier to fold over
 Positive unexpected:
Negative expected:
Negative unexpected: hard to sew, is difficult to not see the cuts that are made
Time: 10min


48b

When it was difficult to hold the cut flaps when being sewed, the idea came to first glue the pieces on the inside so that it is easier to sew.
Because it stayed in place, it was directly sewed upon the elastic part.


This came with the problem that there was a gab, because it was sewed to far from the edge. Of course if it was sewed this way it would always have a little gab where filth can accumulate.
Elements of experience:
Positive expected: more beautiful finish
 Positive unexpected:
Negative expected:
Negative unexpected: gap between the two fabrics, see picture
Time: 15min


48C
The problem with 48b was solved when an extra stitching was applied


Elements of experience:
Positive expected: problem with gap solved
 Positive unexpected: a fun finishing feature
Negative expected:
Negative unexpected:
Time: 2min

48d
After seeing the fun aspect of sewing with zigzag pattern. It was used to attach the top of the casing.


Elements of experience:
Positive expected: no need in using an extra stitching
 Positive unexpected: maybe isn’t needed to bend the fabric in first place because this stitching covers the edge of the fabric so that it can’t fripper
Negative expected:
Negative unexpected:
Time: 10min

48e
The other side of the prototype is completely made of the technique used in 48d


Elements of experience:
Positive expected: faster and easier to make
 Positive unexpected:
Negative expected:
Negative unexpected:
Time: 15min 

zondag 11 mei 2014

Making the filling

The first filling was made with the measures of the knee from Mindy. This was made by pushing her knee into plasticine

Then from that a hard cast is made that is put in a mold to make a new cast from silicone


When it is dry, we get it out of the mold and just have some edges cut away


Elements of experience:
Positive expected:
 Positive unexpected: sits very good, the thought of using another silicone for the end prototype may not be needed
Negative expected:
Negative unexpected: very hard to get it out of the mold.

#
Time
#parts
#materials
# tools
47
1h
3
plasticine
Wood
silicone
Drill
Nail
Glue

donderdag 8 mei 2014

How to sew it, the wrong way

When the first time I tried to sew it, I had difficulties with sewing the parts together.
First I sewed the elastic part.


Then I sewed the other two parts


To combine the parts afterward


This photo is taking from a video while making the prototype. It is exactly the moment when I realize this won’t work. By sewing the under part first, I don’t have place to sew the elastic part on is without making the room for the form smaller. So I had to go search for another method for sewing it


So it became clear that I must sew the three parts on one side first and then sew the two sides together


Elements of experience:
Positive expected:
Positive unexpected: it’s easier to sew first the front and back and then combining the two
Negative expected:
Negative unexpected: the mistake of first sewing the three parts on its own
#
Time
#parts
#materials
# tools
46
1h
2
Fabric
elastic
Sewing machine
scissors


How to make the length of the cords

Measuring the upper and lower leg a maximum, when the leg is bend, and a minimum, when you stand straight, shows that the under leg has an average of 35 cm en the upper 46cm. With these measurements we now cut the cords that will attach the knee protector to the legs. This is shown in the next video.


How to draw on fabric (video test for instructable)


Describing test fabrics


This elastic fabric consists of 6% spandex, if it isn’t elastic enough a fabric with a bigger percentage spandex will be used.

The next few fabrics will be tested for the rougher material:


Cotton: chosen because it absorbs water and for that is good against sweat


Water resistance: when uses outside this fabric may have an advantage


Satin: know to feel real nice on the skin


Polyester viscose: synthetic cotton, a bit rougher than the first cotton presented

Rip test:

For the first selection filter the fabrics where damaged with a sharp object to see how it reacts. By doing this we noticed that the satin and the water resistant fabric aren’t ideal because they rip very fast.


Changing the shape


These following videos show the next steps after prototype 45. After testing prototype 45 it became clear that the bra-closure is the best solution because:

  • It is handy to put on
  • It stays in place
  • Doesn’t create friction
  • Can still be used if stretch fabric is stretched out because of the many uses


Now we going to look at changes to the shape and fabric, in the first film you will see with part of the case have with function and why we going to change the shape:


We learn that
  • A more elegant shape is created
  • A round shape resembles better the knee shape